在日常开发中,我们经常需要监控应用程序的状态,及时发现问题并采取措施解决。而通过邮件发送报警信息则是一种常见的实现方式。
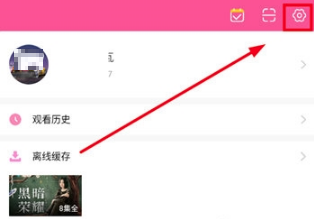
登录到QQ邮箱后台然后点击账户
找到“POP3/SMTP服务”和“IMAP/SMTP服务”项,点“开启”。
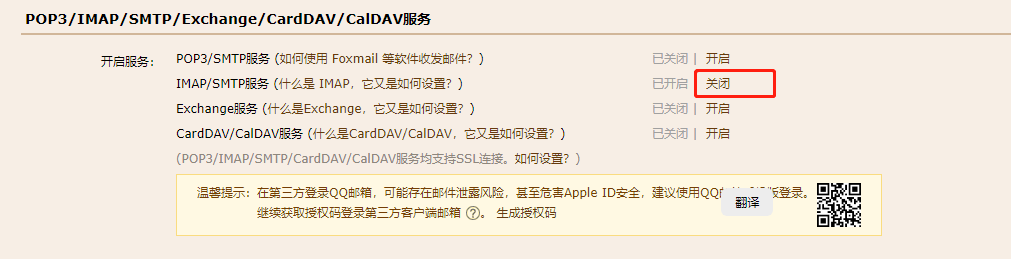
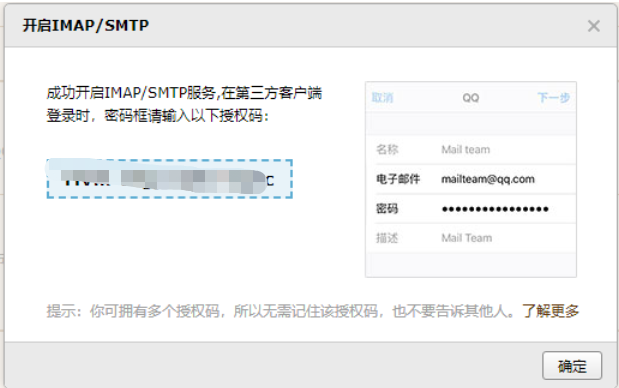
成功开启后可以看到授权码,注意保存这个授权码
使用SSL的通用配置如下:
接收邮件服务器:pop.qq.com,使用SSL,端口号995
发送邮件服务器:smtp.qq.com,使用SSL,端口号465或587
账户名:您的QQ邮箱账户名(如果您是VIP帐号或Foxmail帐号,账户名需要填写完整的邮件地址)
密码:您的QQ邮箱密码
电子邮件地址:您的QQ邮箱的完整邮件地址
先看源码
import smtplib

from email.mime.text import MIMEText

from email.mime.multipart import MIMEMultipart

from email.mime.application import MIMEApplication


# 发件人信息

sender_email = "657029702@qq.com"

sender_password = "上文申请的授权码"


# 收件人信息

recipient_email = "493614550@qq.com"


# 构造邮件对象

msg = MIMEMultipart()

msg['From'] = sender_email

msg['To'] = recipient_email

msg['Subject'] = "这是一封测试邮件"


# 添加正文

body = "这是一封测试邮件,用Python发送。"

msg.attach(MIMEText(body, 'plain'))


# 添加附件

with open("example.pdf", "rb") as attachment:

    part = MIMEApplication(attachment.read(), _subtype='pdf')

    part.add_header('Content-Disposition', 'attachment', filename="example.pdf")

    msg.attach(part)


# 发送邮件

with smtplib.SMTP_SSL('smtp.qq.com', 465) as smtp:

    smtp.login(sender_email, sender_password)

    smtp.sendmail(sender_email, recipient_email, msg.as_string())
这里使用了三方库smtplib,安装一下就行
这里加了一个附件,将example.pdf放到和脚本同一目录下
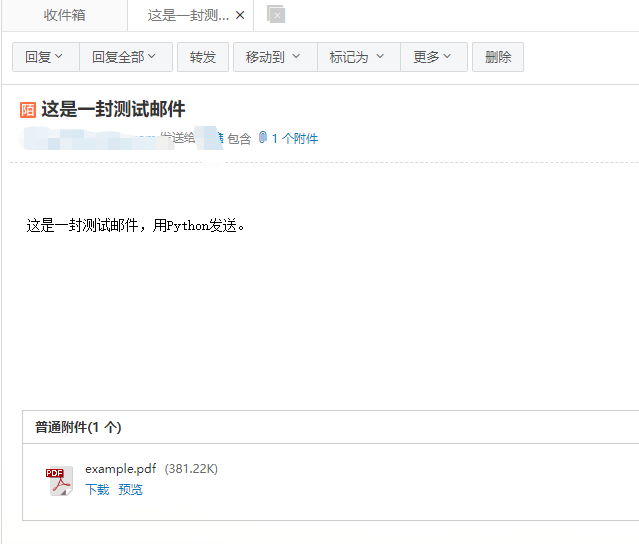
完美!
除了简单的发送邮件到邮箱,Python还可以实现定时发送邮件,下面是实现代码,希望对大家有所帮助
python自动批量发邮件脚本
'''''

该模块使自动发送邮件的模块

模块初始化时需要设置:

sender:发送人

reciver:接收者

smtpServer:发送人的服务器类型

password:登录命令

subject:邮件标题

datafile:数据文件

文件包含六个函数:

senderLogin():连接服务并登录服务

setSubject():设置邮件标题

SendMessage():邮件发送的信息

sendMail():发送邮件

quitMail():关闭邮件服务

run():执行登录、设置邮件标题、设置邮件发送信息、发送邮件、关闭邮件服务

'''


import smtplib

from mangerResultFile import FileManger

from email.mime.text import MIMEText

from email.mime.multipart import MIMEMultipart


class AutoMail(object):

    def __init__(self,sender,reciver,smtpServer, password,subject,datafile):

        #设置发送人

        self.sender=sender

        #设置登录密码

        self.password=password

        #设置接收者

        self.reciver=reciver

        #设置邮件标题

        self.subject=subject

        #设置附件路径

        self.datafile=datafile

        #设置发送邮件服务

        self.smtpServer=smtpServer

        #创建一个smtp实例

        self.smtp = smtplib.SMTP()

        #设置下发送信息包含的类型的信息体

        self.msgRoot =MIMEMultipart('related')

        #调用run函数运行

        self.run()


    #发送用户登录

    def senderLogin(self):

        #通过smtp实例的connect方法连接发送邮件服务

        self.smtp.connect(self.smtpServer)

        #通过smtp实例的login方法登录发送邮件服务

        self.smtp.login(self.sender,self.password)


    def setSubject(self):

        #设置邮件标题

        self.msgRoot['Subject']=self.subject


    def SendMessage(self):

        #读取附件信息到att中

        att =MIMEText(open( self.datafile, 'rb').read(), 'base64', 'utf8')

        #设置att的内容类型

        att["Content-Type"]= 'application/octet-stream'

        #给附件设置一个文件名

        att["Content-Disposition"]= 'attachment; '+'filename='+FileManger().getLastFile()+''


        self.msgRoot.attach(att)


    def sendMail(self):

        #发送邮件

        self.smtp.sendmail(self.sender,self.reciver,self.msgRoot .as_string())


    def quitMail(self):

        #退出邮件服务

        self.smtp.quit()


    def run(self):


        try:

            self.senderLogin()

            self.setSubject()

            self.SendMessage()

            self.sendMail()

            self.quitMail()


   print "send success...."

   except Exception,e:


   print e

   def test():

       #创建一个FileManger实例

       fm=FileManger()

       sender ='wang@163.com'

       receiver ='e.wang@163.com'

       smtpserver ='smtp.163.com'

       password =' '

       ject= 'XQL Autom excut project'

       filpath=fm.getLastFileWithPath()


      try:

          AutoMail(sender,receiver,smtpserver,password,ject,filpath)


         except Exception,e:

print e


if __name__=="__main__":

    test()