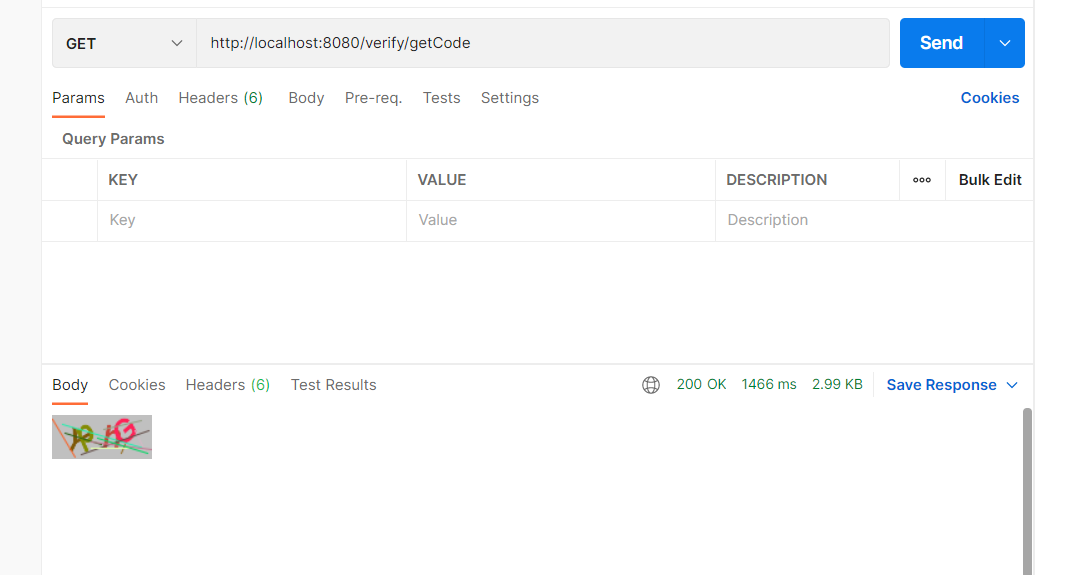
具体效果如下:
第一步:工具类
该工具类为生成验证码图片的核心,直接拷贝到项目即可,无需做修改;可个性化的参数全部对外提供的API,比如 字体大小,背景颜色,干扰线数量,高宽等都可以根据自己的需求设置对应参数;
代码几乎每一行都加了详细的注释;如果遇上特殊的个性化需求,调整一下这个工具类即可实现。
package com.feng.util;

/**

 * @return null

 * @author Ladidol

 * @description

 * @date 2022/4/11 22:15

 */

import java.awt.*;

import java.awt.geom.AffineTransform;

import java.awt.image.BufferedImage;

import java.util.Random;

/**

 * 图形验证码生成

 */

public class VerifyUtil {

    // 默认验证码字符集

    private static final char[] chars = {

            '0', '1', '2', '3', '4', '5', '6', '7', '8', '9',

            'a', 'b', 'c', 'd', 'e', 'f', 'g', 'h', 'i', 'j', 'k', 'l', 'm', 'n', 'o', 'p', 'q', 'r', 's', 't', 'u', 'v', 'w', 'x', 'y', 'z',

            'A', 'B', 'C', 'D', 'E', 'F', 'G', 'H', 'I', 'J', 'K', 'L', 'M', 'N', 'O', 'P', 'Q', 'R', 'S', 'T', 'U', 'V', 'W', 'X', 'Y', 'Z'};

    // 默认字符数量

    private final Integer SIZE;

    // 默认干扰线数量

    private final int LINES;

    // 默认宽度

    private final int WIDTH;

    // 默认高度

    private final int HEIGHT;

    // 默认字体大小

    private final int FONT_SIZE;

    // 默认字体倾斜

    private final boolean TILT;

    private final Color BACKGROUND_COLOR;

    /**

     * 初始化基础参数

     *

     * @param builder

     */

    private VerifyUtil(Builder builder) {

        SIZE = builder.size;

        LINES = builder.lines;

        WIDTH = builder.width;

        HEIGHT = builder.height;

        FONT_SIZE = builder.fontSize;

        TILT = builder.tilt;

        BACKGROUND_COLOR = builder.backgroundColor;

    }

    /**

     * 实例化构造器对象

     *

     * @return

     */

    public static Builder newBuilder() {

        return new Builder();

    }

    /**

     * @return 生成随机验证码及图片

     * Object[0]:验证码字符串;

     * Object[1]:验证码图片。

     */

    public Object[] createImage() {

        StringBuffer sb = new StringBuffer();

        // 创建空白图片

        BufferedImage image = new BufferedImage(WIDTH, HEIGHT, BufferedImage.TYPE_INT_RGB);

        // 获取图片画笔

        Graphics2D graphic = image.createGraphics();

        // 设置抗锯齿

        graphic.setRenderingHint(RenderingHints.KEY_ANTIALIASING, RenderingHints.VALUE_ANTIALIAS_ON);

        // 设置画笔颜色

        graphic.setColor(BACKGROUND_COLOR);

        // 绘制矩形背景

        graphic.fillRect(0, 0, WIDTH, HEIGHT);

        // 画随机字符

        Random ran = new Random();

        //graphic.setBackground(Color.WHITE);

        // 计算每个字符占的宽度,这里预留一个字符的位置用于左右边距

        int codeWidth = WIDTH / (SIZE + 1);

        // 字符所处的y轴的坐标

        int y = HEIGHT * 3 / 4;

        for (int i = 0; i < SIZE; i++) {

            // 设置随机颜色

            graphic.setColor(getRandomColor());

            // 初始化字体

            Font font = new Font(null, Font.BOLD + Font.ITALIC, FONT_SIZE);

            if (TILT) {

                // 随机一个倾斜的角度 -45到45度之间

                int theta = ran.nextInt(45);

                // 随机一个倾斜方向 左或者右

                theta = (ran.nextBoolean() == true) ? theta : -theta;

                AffineTransform affineTransform = new AffineTransform();

                affineTransform.rotate(Math.toRadians(theta), 0, 0);

                font = font.deriveFont(affineTransform);

            }

            // 设置字体大小

            graphic.setFont(font);

            // 计算当前字符绘制的X轴坐标

            int x = (i * codeWidth) + (codeWidth / 2);

            // 取随机字符索引

            int n = ran.nextInt(chars.length);

            // 得到字符文本

            String code = String.valueOf(chars[n]);

            // 画字符

            graphic.drawString(code, x, y);

            // 记录字符

            sb.append(code);

        }

        // 画干扰线

        for (int i = 0; i < LINES; i++) {

            // 设置随机颜色

            graphic.setColor(getRandomColor());

            // 随机画线

            graphic.drawLine(ran.nextInt(WIDTH), ran.nextInt(HEIGHT), ran.nextInt(WIDTH), ran.nextInt(HEIGHT));

        }

        // 返回验证码和图片

        return new Object[]{sb.toString(), image};

    }

    /**

     * 随机取色

     */

    private Color getRandomColor() {

        Random ran = new Random();

        Color color = new Color(ran.nextInt(256), ran.nextInt(256), ran.nextInt(256));

        return color;

    }

    /**

     * 构造器对象

     */

    public static class Builder {

        // 默认字符数量

        private int size = 4;

        // 默认干扰线数量

        private int lines = 10;

        // 默认宽度

        private int width = 80;

        // 默认高度

        private int height = 35;

        // 默认字体大小

        private int fontSize = 25;

        // 默认字体倾斜

        private boolean tilt = true;

        //背景颜色

        private Color backgroundColor = Color.LIGHT_GRAY;

        public Builder setSize(int size) {

            this.size = size;

            return this;

        }

        public Builder setLines(int lines) {

            this.lines = lines;

            return this;

        }

        public Builder setWidth(int width) {

            this.width = width;

            return this;

        }

        public Builder setHeight(int height) {

            this.height = height;

            return this;

        }

        public Builder setFontSize(int fontSize) {

            this.fontSize = fontSize;

            return this;

        }

        public Builder setTilt(boolean tilt) {

            this.tilt = tilt;

            return this;

        }

        public Builder setBackgroundColor(Color backgroundColor) {

            this.backgroundColor = backgroundColor;

            return this;

        }

        public VerifyUtil build() {

            return new VerifyUtil(this);

        }

    }

}使用默认参数:
//生成图片验证码

Object[] verify = VerifyUtil.newBuilder().build().createImage();
自定义参数生成:
// 这个根据自己的需要设置对应的参数来实现个性化

// 返回的数组第一个参数是生成的验证码,第二个参数是生成的图片

Object[] objs = VerifyUtil.newBuilder()

        .setWidth(120)   //设置图片的宽度

        .setHeight(35)   //设置图片的高度

        .setSize(6)      //设置字符的个数

        .setLines(10)    //设置干扰线的条数

        .setFontSize(25) //设置字体的大小

        .setTilt(true)   //设置是否需要倾斜

        .setBackgroundColor(Color.WHITE) //设置验证码的背景颜色

        .build()         //构建VerifyUtil项目

        .createImage();  //生成图片
需要引入的maven依赖:
        <!--redis相关配置-->

        <dependency>

            <groupId>org.springframework.boot</groupId>

            <artifactId>spring-boot-starter-data-redis</artifactId>

        </dependency>

        <!-- redis 连接池 -->

        <!--新版本连接池lettuce-->

        <dependency>

            <groupId>org.apache.commons</groupId>

            <artifactId>commons-pool2</artifactId>

        </dependency>

        <!-- 图形验证码 -->

        <dependency>

            <groupId>net.jodah</groupId>

            <artifactId>expiringmap</artifactId>

            <version>0.5.10</version>

        </dependency>
获取相关的验证码:
service层:
package com.feng.service;


import org.cuit.epoch.result.Result;


import javax.servlet.http.HttpServletRequest;

import javax.servlet.http.HttpServletResponse;

import java.io.IOException;


/**

 * @return null

 * @author Ladidol

 * @description

 * @date 2022/4/11 22:15

 */


public interface VerifyService {

    /**

     * 创建图片验证码

     * @param response

     * @param request

     * @throws IOException

     */

    void createCode(HttpServletResponse response, HttpServletRequest request) throws IOException;

    /**

     * 检查图片验证码

     * @param

     * @param

     * @throws IOException

     */

    Result<String> checkCode(String verificationCode);

}
serviceimpl层:
package com.feng.service.impl;
import com.feng.service.VerifyService;
import com.feng.util.RedisServiceImpl;
import com.google.common.net.HttpHeaders;
import com.feng.util.VerifyUtil;
import org.springframework.http.ResponseCookie;
import org.springframework.stereotype.Service;
import javax.annotation.Resource;
import javax.imageio.ImageIO;
import javax.servlet.http.HttpServletRequest;
import javax.servlet.http.HttpServletResponse;
import javax.servlet.http.HttpSession;
import java.awt.image.BufferedImage;
import java.io.IOException;
import java.io.OutputStream;
import java.time.Duration;
/**
* @return null
* @author Ladidol
* @description
* @date 2022/4/11 22:15
*/
@Service
public class VerifyServiceImpl implements VerifyService {
@Resource
RedisServiceImpl redisUtil;
/**
* 生成图片验证码
* @param response
* @param request
* @throws IOException
*/
@Override
public void createCode(HttpServletResponse response, HttpServletRequest request) throws IOException {
//获取session
HttpSession session = request.getSession();
//获得sessionId
String id = session.getId();
System.out.println();
ResponseCookie cookie = ResponseCookie.from("JSESSIONID",id)
.secure(true)
.domain("")
.path("/")
.maxAge(Duration.ofHours(1))
.sameSite("None")
.build();
//清除之前缓存的图片验证码
if (!String.valueOf(request.getSession().getAttribute("SESSION_VERIFY_CODE_"+id)).isEmpty()){
String getVerify = String.valueOf(request.getSession().getAttribute("SESSION_VERIFY_CODE_"+id));
redisUtil.del(getVerify);
System.out.println("清除成功");
}
//生成图片验证码,用的默认参数
Object[] verify = VerifyUtil.newBuilder().build().createImage();
//将验证码存入session
session.setAttribute("SESSION_VERIFY_CODE_" + id, verify[0]);
//打印验证码
System.out.println(verify[0]);
//将验证码存入redis
redisUtil.set((String) verify[0],id,5*60);
//将图片传给浏览器
BufferedImage image = (BufferedImage) verify[1];
response.setContentType("image/png");
response.setHeader(HttpHeaders.SET_COOKIE,cookie.toString());
OutputStream ops = response.getOutputStream();
ImageIO.write(image,"png",ops);
}
@Override
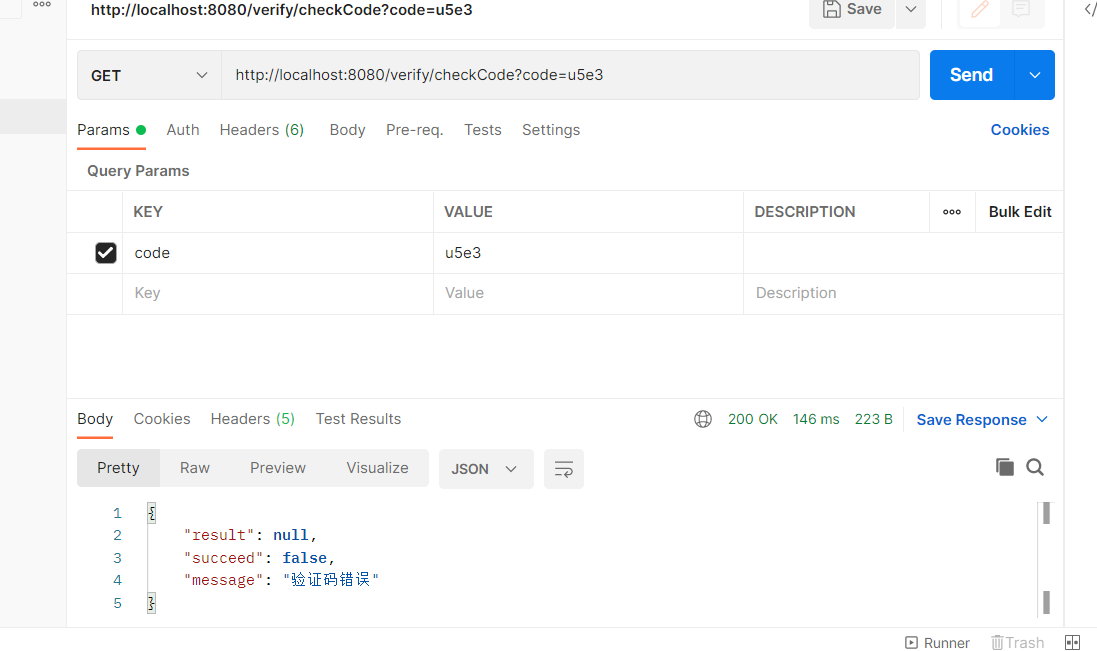
public Result<String> checkCode(String verificationCode){
if (!redisUtil.hasKey(verificationCode)){
return new Result<>(false,"验证码错误");
}
redisUtil.del(verificationCode);
return R.success();
}
}这里面还会用到redis相关的工具类,我就不列出来了,想要的话可以看我以前的博客工具类戳这里
controller层:
这里有用到@RequiredArgsConstructor, 就是简单的注入而已, 如果想要详细了解戳这里
package com.feng.controller;
import lombok.RequiredArgsConstructor;
import com.feng.annotation.LimitRequest;
import com.feng.service.VerifyService;
import org.springframework.web.bind.annotation.*;
import javax.servlet.http.HttpServletRequest;
import javax.servlet.http.HttpServletResponse;
import java.io.IOException;
/**
* @return null
* @author Ladidol
* @description 这里主要就是多种验证码和登录相关的东西
* @date 2022/4/11 21:46
*/
@RestController
@RequestMapping("/verify")
@RequiredArgsConstructor//这是在lombok工具给的注入方式,真帅
public class VerifyController {
private final VerifyService verifyService;
/**
* 获取图片验证码
*/
@LimitRequest(count = 5)//这个注解就是表示, 你在限制时间里(我们这里默认是六秒钟), 只能请求五次
@GetMapping("/getCode")
public void getCode(HttpServletResponse response, HttpServletRequest request) throws IOException {
verifyService.createCode(response, request);
}
@LimitRequest(count = 5)//这个注解就是表示, 你在限制时间里(我们这里默认是六秒钟), 只能请求五次
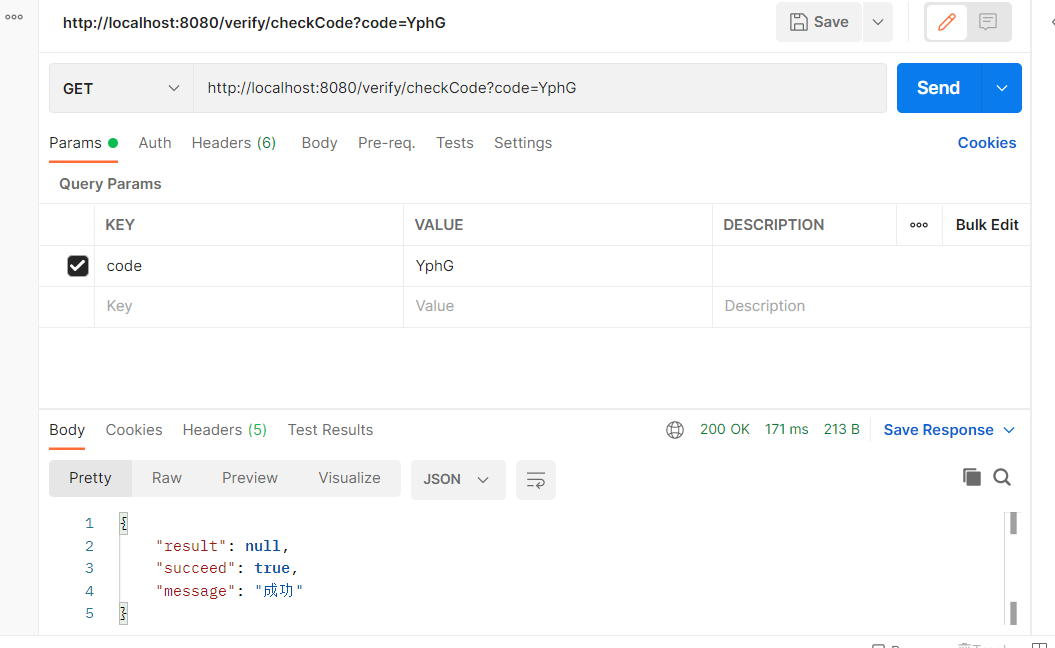
@GetMapping("/checkCode")
public Result<String> checkCode(String code){
return verifyService.checkCode(code);
}
}这里为了不被一直无限制的访问该服务, 我们用了一个限制ip访问次数的注解@LimitRequest
annotion包下的注解类:
package com.feng.annotation;


import java.lang.annotation.*;


/**

 * @return null

 * @author Ladidol

 * @description 限制ip访问次数注解

 * @date 2022/4/11 22:15

 */


@Documented

@Target(ElementType.METHOD) // 说明该注解只能放在方法上面

@Retention(RetentionPolicy.RUNTIME)

public @interface LimitRequest {

    long time() default 6000; // 限制时间 单位:毫秒

    int count() default 3; // 允许请求的次数


}
aspect包下的切面类:
package com.feng.aspect;
import net.jodah.expiringmap.ExpirationPolicy;
import net.jodah.expiringmap.ExpiringMap;
import org.aspectj.lang.ProceedingJoinPoint;
import org.aspectj.lang.annotation.Around;
import org.aspectj.lang.annotation.Aspect;
import org.aspectj.lang.annotation.Pointcut;
import com.feng.annotation.LimitRequest;
import org.cuit.epoch.exception.AppException;
import org.springframework.stereotype.Component;
import org.springframework.web.context.request.RequestAttributes;
import org.springframework.web.context.request.RequestContextHolder;
import org.springframework.web.context.request.ServletRequestAttributes;
import javax.servlet.http.HttpServletRequest;
import java.util.concurrent.ConcurrentHashMap;
import java.util.concurrent.TimeUnit;
/**
* @return null
* @author Ladidol
* @description
* @date 2022/4/11 22:15
*/
@Aspect
@Component
public class LimitRequestAspect {
private static ConcurrentHashMap<String, ExpiringMap<String, Integer>> book = new ConcurrentHashMap<>();
// 定义切点
// 让所有有@LimitRequest注解的方法都执行切面方法
@Pointcut("@annotation(limitRequest)")
public void excudeService(LimitRequest limitRequest) {
}
@Around("excudeService(limitRequest)")
public Object doAround(ProceedingJoinPoint pjp, LimitRequest limitRequest) throws Throwable {
// 获得request对象
RequestAttributes ra = RequestContextHolder.getRequestAttributes();
ServletRequestAttributes sra = (ServletRequestAttributes) ra;
HttpServletRequest request = sra.getRequest();
// 获取Map对象, 如果没有则返回默认值
// 第一个参数是key, 第二个参数是默认值
ExpiringMap<String, Integer> uc = book.getOrDefault(request.getRequestURI(), ExpiringMap.builder().variableExpiration().build());
Integer uCount = uc.getOrDefault(request.getRemoteAddr(), 0);
if (uCount >= limitRequest.count()) { // 超过次数,不执行目标方法
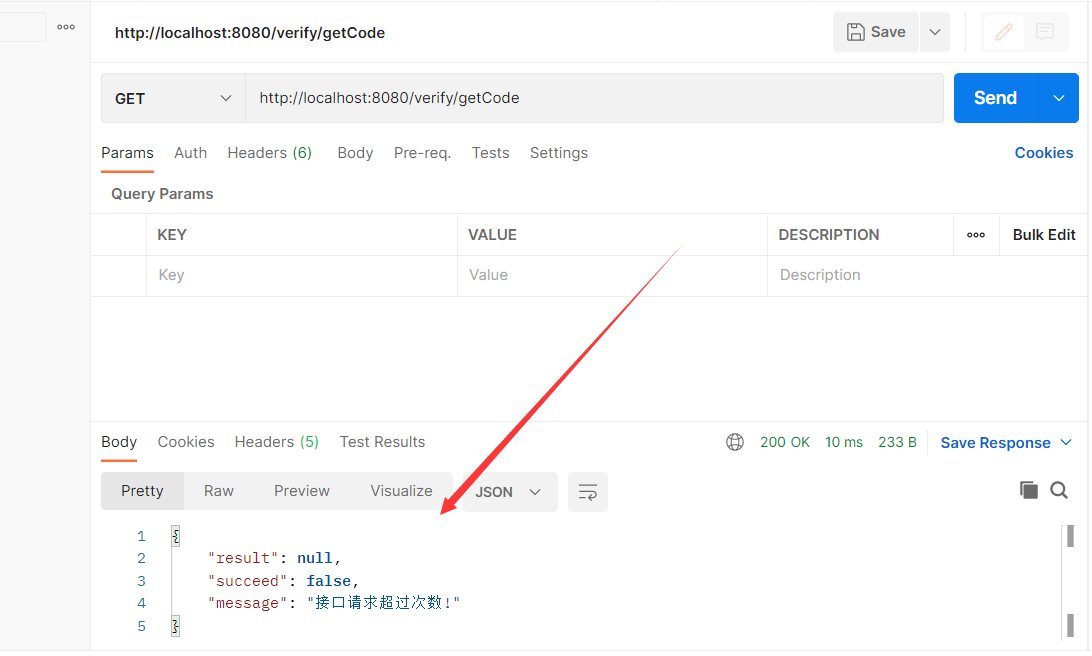
System.out.println("接口请求超过次数!");
throw new AppException("接口请求超过次数!");
} else if (uCount == 0) { // 第一次请求时,设置有效时间
//
uc.put(request.getRemoteAddr(), uCount + 1, ExpirationPolicy.CREATED, limitRequest.time(), TimeUnit.MILLISECONDS);
} else { // 未超过次数, 记录加一
uc.put(request.getRemoteAddr(), uCount + 1);
}
book.put(request.getRequestURI(), uc);
// result的值就是被拦截方法的返回值
Object result = pjp.proceed();
return result;
}
}为了捕获全局的异常抛出, 且符合restful规范我们加一个这个处理类:
handle包下面的全局异常类:
package org.cuit.epoch.handler;

import lombok.extern.log4j.Log4j2;

import org.cuit.epoch.exception.AppException;

import org.cuit.epoch.result.R;

import org.cuit.epoch.result.Result;

import org.springframework.web.bind.annotation.ControllerAdvice;

import org.springframework.web.bind.annotation.ExceptionHandler;

import org.springframework.web.bind.annotation.ResponseBody;

@ControllerAdvice

@Log4j2

public class GlobalExceptionHandler {

    @ExceptionHandler(Exception.class)

    @ResponseBody

    public Result error(Exception e) {

        log.error(e.getMessage());

        e.printStackTrace();

        return R.fail(e.getMessage());

    }

    @ExceptionHandler(AppException.class)

    @ResponseBody

    public Result error(AppException e) {

        log.error(e.getMessage());

        e.printStackTrace();

        return R.fail(e.getMessage());

    }

}
application.yaml文件:
spring:

  cache:

    type:

      redis

  redis: #redis连接配置

    host: 自己redis的ip地址

    port: redis端口

    password: 密码

    jedis:

      pool:

        max-active: 8

        max-wait: -1ms

        max-idle: 500

        min-idle: 0

    lettuce:

      shutdown-timeout: 0ms
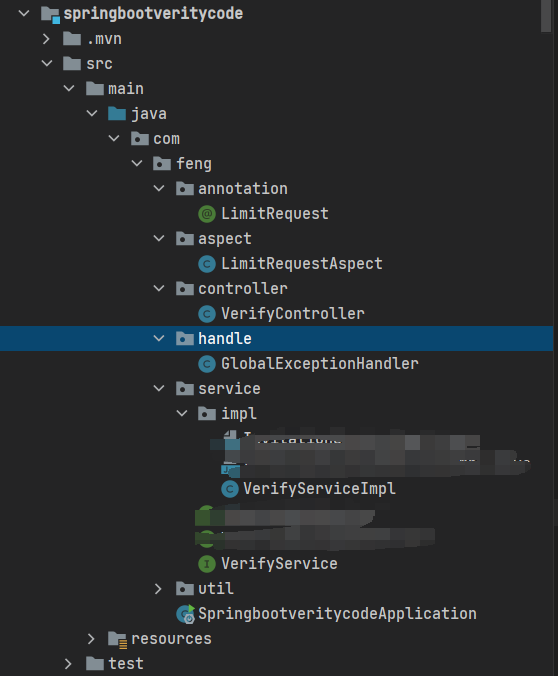
最终项目结构如下:
先得到一个验证码:
验证一下是否成功:
成功结果:
验证失败结果:
当请求在规定时间内的请求数超过规定的数量时或有报错: