当我们在项目中登录使用验证码的时候,不妨试试Kaptcha生成验证码,非常简单
1、首先,我们在pom.xml文件中引入kaptcha的maven依赖
<!-- kaptcha验证码 -->

<dependency>

	<groupId>com.github.penggle</groupId>

	<artifactId>kaptcha</artifactId>

	<version>2.3.2</version>

</dependency>
2、然后,我们编写kaptcha的配置类:KaptchaConfig.java
package com.lzzy.meet.common.kaptcha;


import com.google.code.kaptcha.impl.DefaultKaptcha;

import com.google.code.kaptcha.util.Config;

import lombok.extern.slf4j.Slf4j;

import org.springframework.context.annotation.Bean;

import org.springframework.stereotype.Component;

import java.util.Properties;


/**

 * @ClassName KaptchaConfig

 * kaptcha配置类

 * @Author

 * @Date 2019-09-05 13:50:50

 * @Version 1.0

 **/

@Slf4j

@Component

public class KaptchaConfig {


    @Bean

    public DefaultKaptcha getKaptcheCode() {

        DefaultKaptcha defaultKaptcha = new DefaultKaptcha();

        Properties properties = new Properties();

        properties.setProperty("kaptcha.border", "no");

        properties.setProperty("kaptcha.textproducer.font.color", "black");

        properties.setProperty("kaptcha.image.width", "100");

        properties.setProperty("kaptcha.image.height", "36");

        properties.setProperty("kaptcha.textproducer.font.size", "30");

        properties.setProperty("kaptcha.obscurificator.impl", "com.google.code.kaptcha.impl.ShadowGimpy");

        properties.setProperty("kaptcha.session.key", "code");

        properties.setProperty("kaptcha.noise.impl", "com.google.code.kaptcha.impl.NoNoise");

        properties.setProperty("kaptcha.background.clear.from", "232,240,254");

        properties.setProperty("kaptcha.background.clear.to", "232,240,254");

        properties.setProperty("kaptcha.textproducer.char.length", "4");

        properties.setProperty("kaptcha.textproducer.font.names", "彩云,宋体,楷体,微软雅黑");

        Config config = new Config(properties);

        defaultKaptcha.setConfig(config);

        return defaultKaptcha;

    }

}
3、接下来,我们编写kaptcha的控制层:KaptchaController.java
package com.lzzy.meet.common.kaptcha;
import com.google.code.kaptcha.Constants;
import com.google.code.kaptcha.Producer;
import lombok.extern.slf4j.Slf4j;
import org.springframework.beans.factory.annotation.Autowired;
import org.springframework.stereotype.Controller;
import org.springframework.web.bind.annotation.GetMapping;
import org.springframework.web.bind.annotation.RequestMapping;
import javax.imageio.ImageIO;
import javax.servlet.ServletOutputStream;
import javax.servlet.http.HttpServletRequest;
import javax.servlet.http.HttpServletResponse;
import java.awt.image.BufferedImage;
/**
* @ClassName KaptchaController
* kaptcha调用
* @Author
* @Date 2019-09-05 13:59:59
* @Version 1.0
**/
@Slf4j
@Controller
@RequestMapping("kaptcha")
public class KaptchaController {
@Autowired
private Producer producer;
@GetMapping("kaptcha-image")
public void getKaptchaImage(HttpServletRequest request, HttpServletResponse response) throws Exception {
response.setDateHeader("Expires", 0);
response.setHeader("Cache-Control", "no-store, no-cache, must-revalidate");
response.addHeader("Cache-Control", "post-check=0, pre-check=0");
response.setHeader("Pragma", "no-cache");
response.setContentType("image/jpeg");
String capText = producer.createText();
log.info("******************当前验证码为:{}******************", capText);
// 将验证码存于session中
request.getSession().setAttribute(Constants.KAPTCHA_SESSION_KEY, capText);
BufferedImage bi = producer.createImage(capText);
ServletOutputStream out = response.getOutputStream();
// 向页面输出验证码
ImageIO.write(bi, "jpg", out);
try {
// 清空缓存区
out.flush();
} finally {
// 关闭输出流
out.close();
}
}
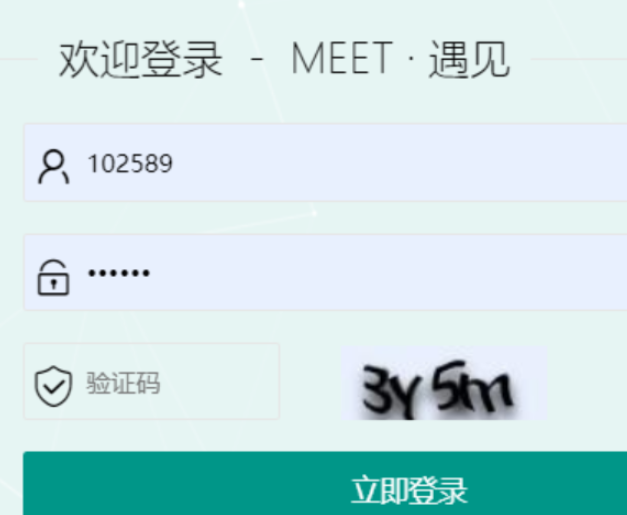
}4、然后,我们就可以在前端调用katpcha的接口生成验证码了:
<img th:src="@{/kaptcha/kaptcha-image}" class="ver_btn" onclick="this.src=this.src+'?c='+Math.random();"/>由于我这里使用的是 thymeleaf 模板引擎,所以路径名称会有点奇怪,生成的验证码样式如图所示:
5、最后,我们将用户在客户端登陆时输入的验证码传送到服务端进行验证:
/**

	 * 验证验证码

	 * @param

	 * @return 正确:true/错误:false

	 */

	public static boolean validate(String registerCode) {

		// 获取Session中验证码

		Object captcha = ServletUtils.getAttribute(Constants.KAPTCHA_SESSION_KEY);

		// 判断验证码是否为空

		if (StringUtils.isEmpty(registerCode)) {

			return false;

		}

		// 校验验证码的正确与否

		boolean result = registerCode.equalsIgnoreCase(captcha.toString());

		if (result) {

			// 正确了后,将验证码从session中删掉

			ServletUtils.getRequest().getSession().removeAttribute(Constants.KAPTCHA_SESSION_KEY);

		}

		// 返回验证结果

		return result;

	}